
As promised, it is time to update a little more often. This time I actually have made some progress that is a bit more hands on than usual, so enjoy!
Before I dive into my project update I just have to mention the storm that passed by the night after the last update. It was quite spectacular, with heavy rains and the whole sky lit up during most of the night with lightning and thunder. Finally I got the experience of the rain that sometimes graces this area with plenty water, as it was hammering down hard on the boat. At about 23:30 I just wanted to get out and check the lines to make sure that the roaring wind didn’t manage to pull the boat free and to make sure that the boats next to me stayed put as well. There was just a drizzle at the moment, but I felt that I at least should put on my rain jacket just in case. And I’m really happy I did, because as soon as I stepped out onto the deck someone pushed the button and the water was coming down by the buckets! It took me less than a minute to check everything but as I got back in under the bimini my trousers were soaked! Amazing. I felt like I was back in Gothenburg for a moment!
So, it has been a week since then, and now it is all back to normal again, but there is a forecast that this weekend will be quite windy, so it will be interesting.
This week has been fantastic, as the progress has been so much more physical than usual, first I managed to epoxy the battery box in the battery compartment of the starboard quarterbirth, which was quite exciting since never worked with epoxy before. I mixed it so that it was like a thick porridge, or peanut butter as it seems to be the normal comparison (it isn’t that common in Sweden to eat peanut butter). But you all know the consistency – it sticks to everything, but doesn’t run at all.
Since there is no such thing as a right angle on a boat, I had to mix together a batch large enough to fill the gaps between the box and the slanted sides of the grid of the boat (that thing gives the boats hull its rigidity) and at the same time not too much so that it would kick off in the container and thus not be useful any more. I use a fast hardener which should give me about 15-18 minutes of working time. I thought it would be smart to use the technique of using a plastic bag and cut a corner so that I could use it to control the application, but I realized rather quickly it wasn’t the method to use in this set up, so I just started spreading it with a stir stick, it was much better!
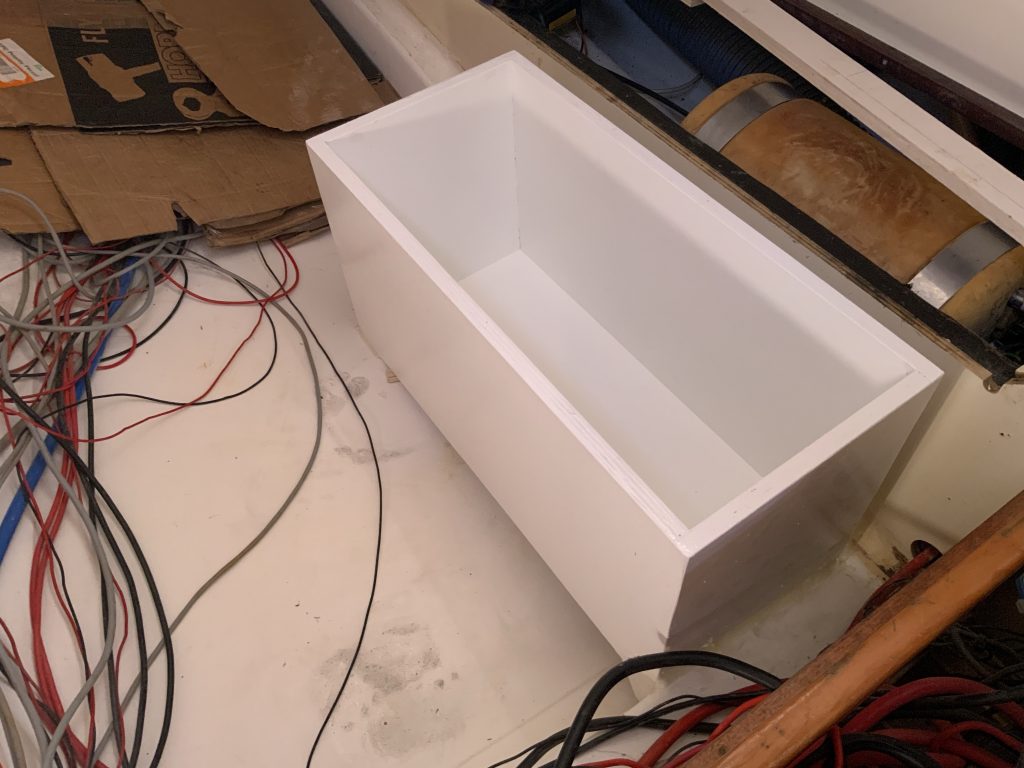
Standing over the battery compartment with the battery box on its side with a thick layer of epoxi on three sides, knowing that it had to be placed exactly where it will stay for the rest of its existence pretty much on the first try it was both scary and thrilling. This is the biggest change I have done so far on the boat and in a sense it marks a milestone, where I actually begin to own the boat. I hope you know how I mean, the feeling is that it is truly mine now and I actually can do whatever I like with it. It’s a responsibility of course, but also a wonderful feeling of freedom. It is a little like when you go from just mowing your lawn to actually pick up a shovel and start digging to make a new flower bed or plant a tree. I’m no longer the maintainer of the boat, I am its creator.
But I digress. Lifting up the battery box, rotating it upright and pushing it down to place it where it would be.. Why doesn’t it fit? Why is there a wiggle to it towards one corner? Weird… Oh, crap..! I put it down too far aft, resulting it to stand directly on the hull, way too low. Lifting it up again, noticing that the piece of wood that was supposed to keep it at the right height at the forward end now was stuck in the epoxi, which required me to remove it from the goo and try to spread the epoxi evenly again, putting the piece back where it was supposed to be and then place the battery box on top of it this time, instead of next to it. Success!
I checked the height, and it seemed reasonable, and progressed checking the epoxi, to make sure that it wasn’t all over the place. What I noticed was that I could have used more than I did, so I made another batch and started to sculpt the epoxi at my best effort to look… well… not too unprofessional at least. After a few minutes I was quite happy with the result, checked the height a last time and noticed that it was maybe a smidge too high in the forward port corner (left if you look forward) but it couldn’t be helped now as the epoxi already was setting. I did have a plan to handle it anyway, so I wasn’t that concerned.
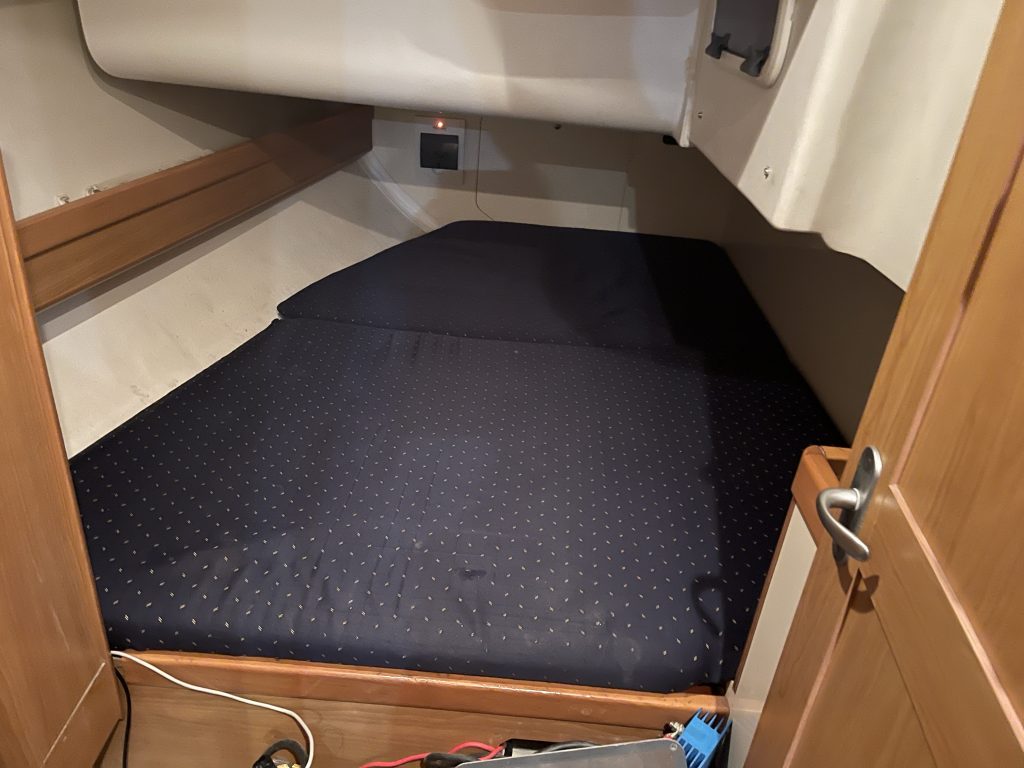
As you might remember I was originally intending to mount the battery cells on their side, but it isn’t a viable option I found out later, so the battery is a little higher than the space I have for it. To be more exact, I made the battery box to be 36mm higher than the space allowed. The reason is that it is the exact height of two 18mm plywood sheets on top of each other so that I can raise the bed slightly and thus gain the space I need. Unfortunately, I now needed about two more millimeters for everything to fit. It might sound like a silly difference, but it is of importance as the plywood that the bed is made of would be wobbling around on top of the battery box, making noises as anyone sleeping there moved. And to me, sleep is really important.
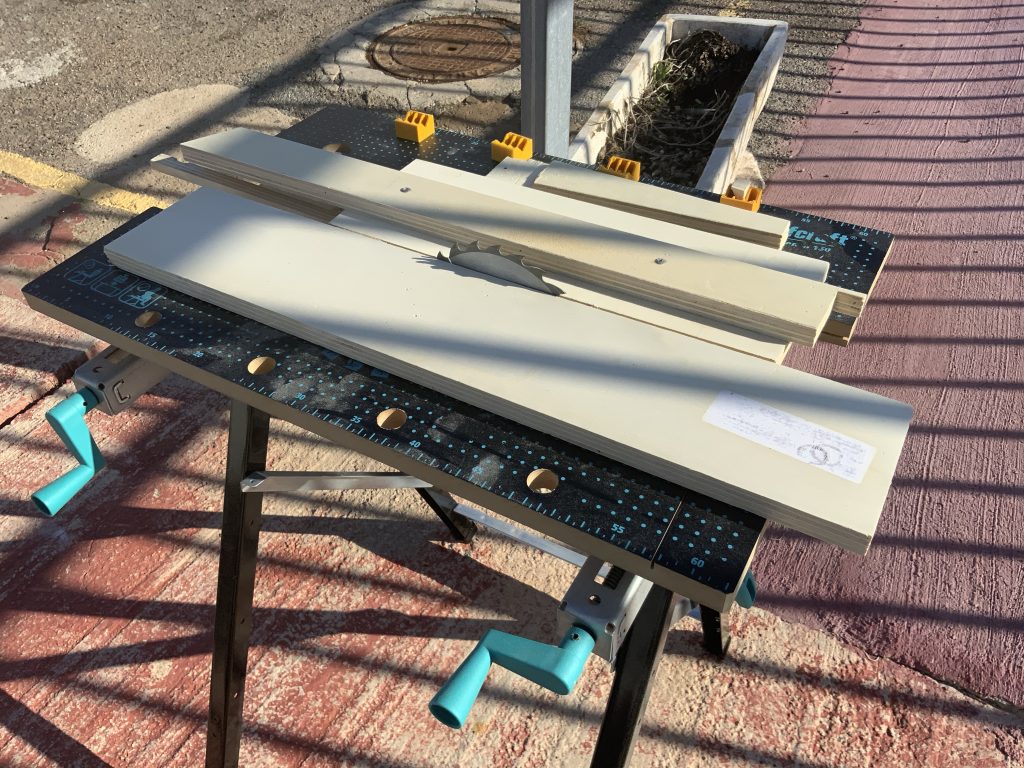
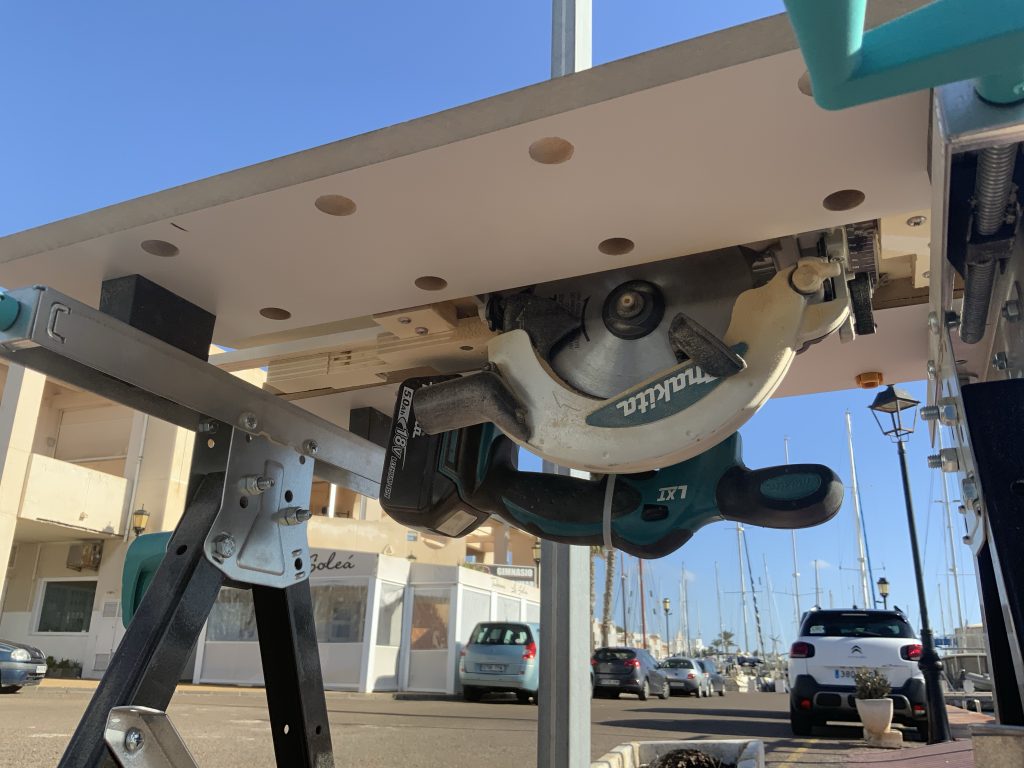
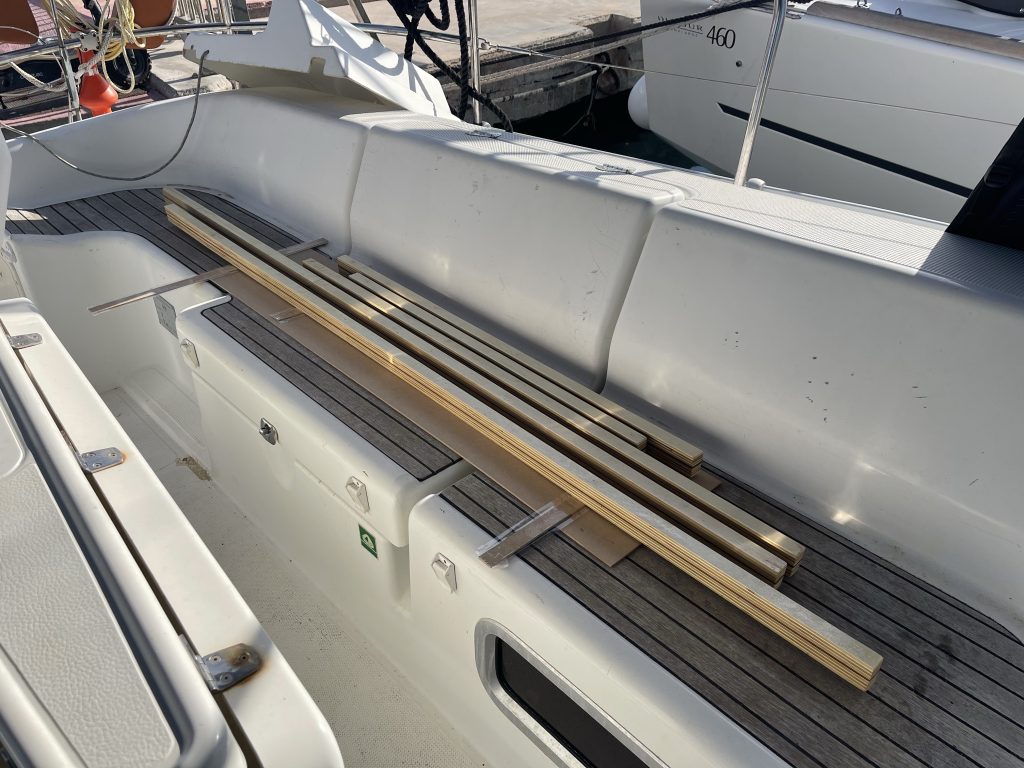
So, what to do? Well, first of all, I needed to make the slats that I would use to raise the bed to start with. I have a circular saw, which would probably do the job nicely, but it is always hard to get any repetitive precision running down long lengths of plywood sheets to make those slats, or strips if you prefer. The prefect tool for doing that is a table saw, but I don’t have one. But I have a work table and my circular saw, so it shouldn’t be too hard to construct a table saw, right? I mean, a table saw is just a circular saw put upside down under a table with the blade sticking up through it. Add a fence and you’re done! So I did. Which was probably the best decision I made that day! It was a bliss to rip those sheets down to strips, and then, as I needed about two millimeter extra height, I had a sheet of three millimeter MDF board that I bought as a “it will probably come in handy some day” thing that I made way too many strips of. But now I have a lot of strips that can be used for a multitude of purposes.
Anyway, after I had made the strips I used some wooden glue to glue the three layer sandwich together, the MDF strip between the two plywood strips, clamped them and then decided I could just add some screws to make sure they wouldn’t come apart no matter what happened. After that I just sanded them down to size, mixed up some epoxi and rolled them with it to seal the wood so that there wouldn’t be any risk that it would get wet, swell and eventually fall to pieces. At least not for some years, hopefully.
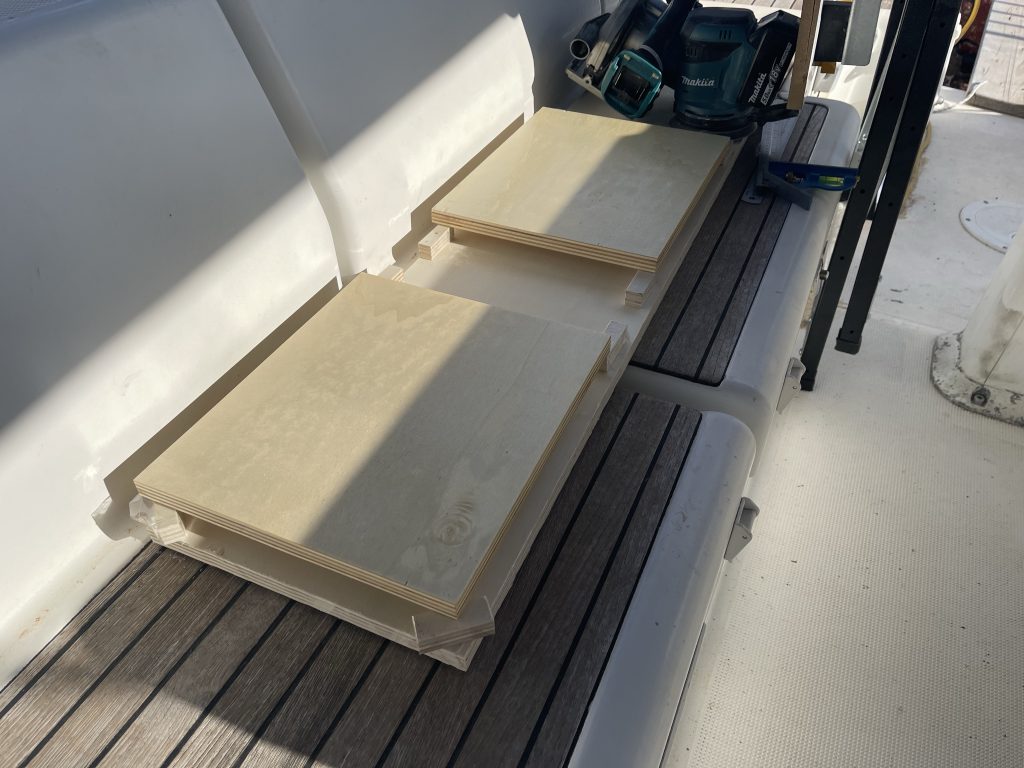
While making these strips I also made, sanded and epoxied two backing plates for my Victron MultiPlus Charger/Inverter as well as for my Isolation Transformer, but more about them soon.
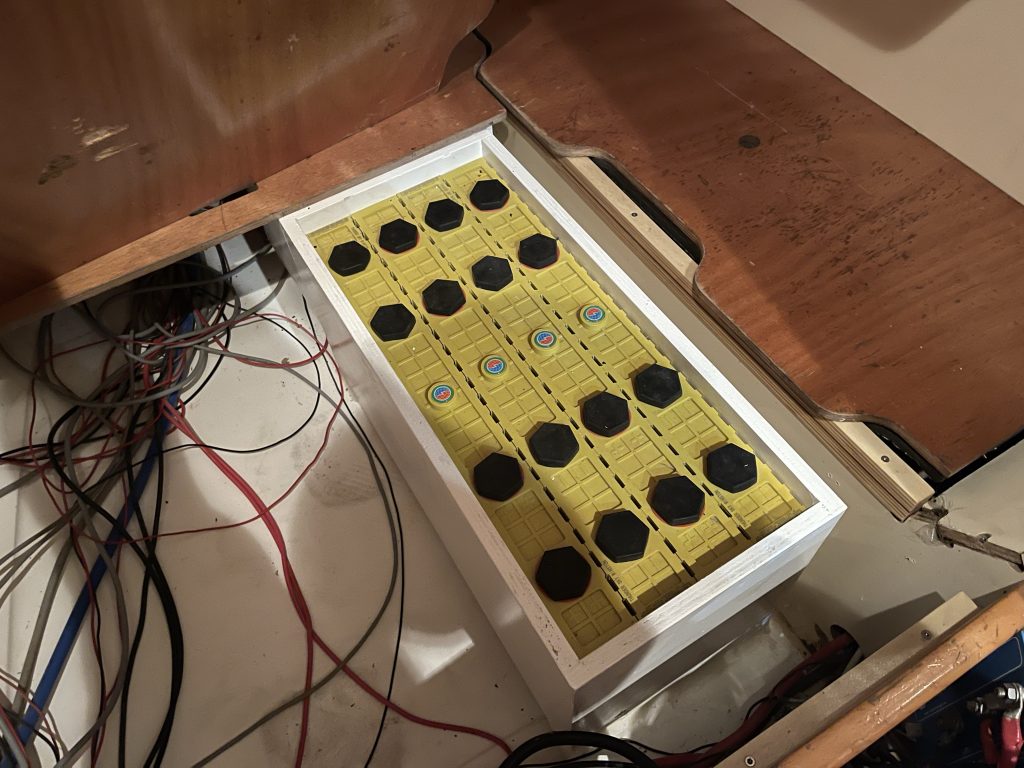
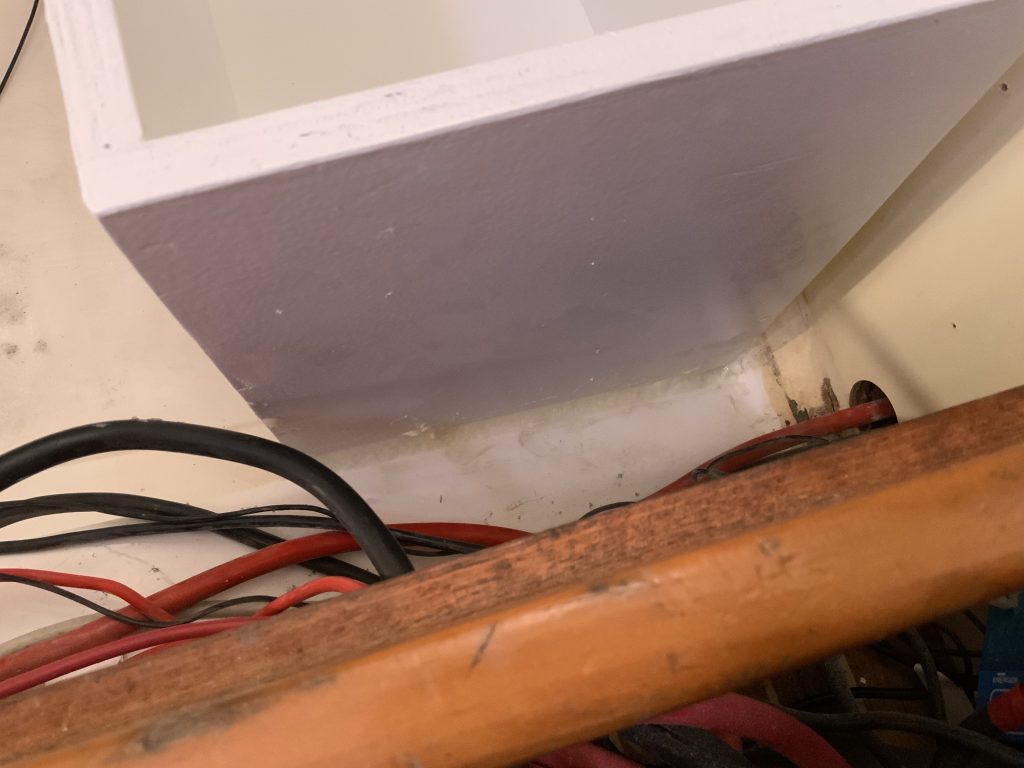
The now dry strips of plywood and MDF are my spacers that I then screwed into the boat around the perimeter of the bed, on two sides to the boat itself, and on one side to the hatches for the battery compartment, as there was no wood to screw it to and I don’t like the idea of screwing things to the fiberglass unless I really have to. In the end I think it got quite nice, what do you think?
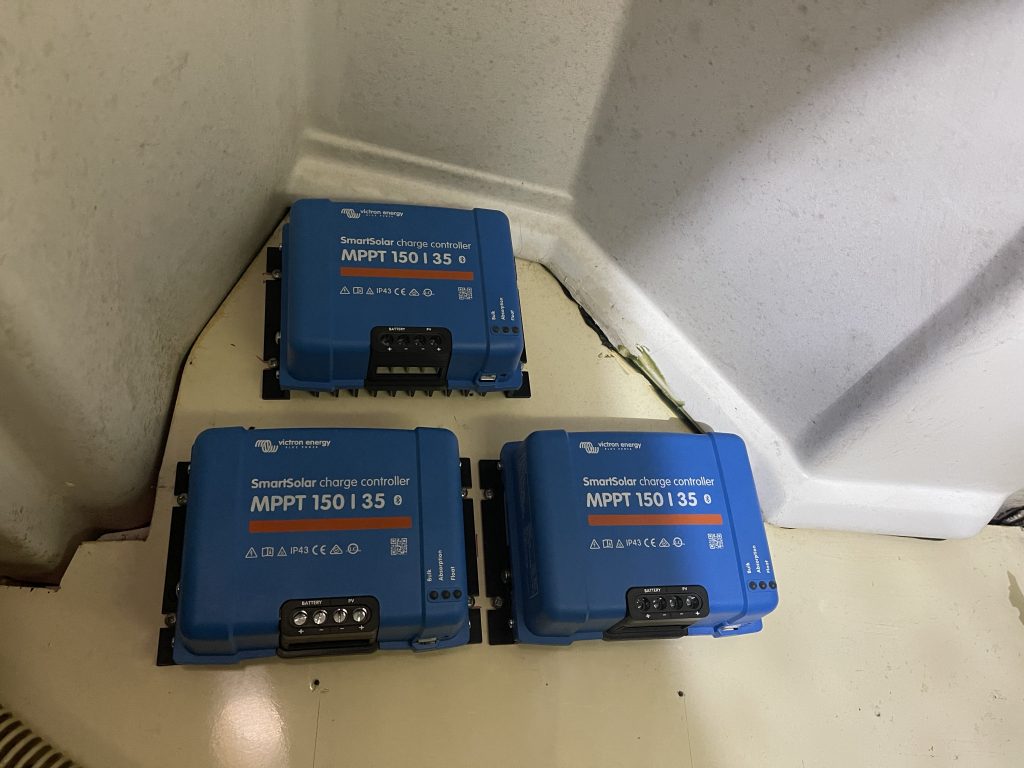
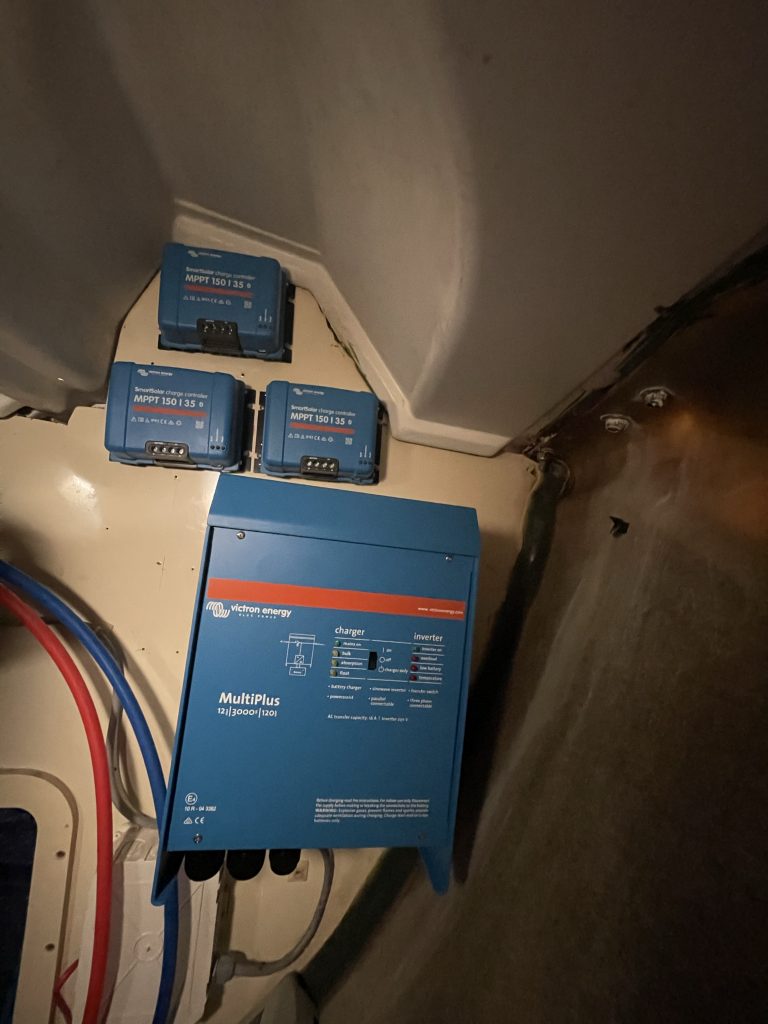
My installation wasn’t done though, it was time to get really excited by installing the electronics required to get all of this working. First I had to install the solar chargers, as they dictated pretty much how much space I had over for the MultiPlus, and vice versa. I tucked the solar chargers as far up as I possibly could in the technical compartment of my boat (just a fancier word for behind the transom bulkhead, it is really a shitty place as it is cramped and I have to crawl around on raw fiberglass which is itchy, itchy). After that I measured how much the big blue box needed to be installed, measured it down and then tried to tuck it in as close to the hull as possible. In theory I would most likely be able to put another MultiPlus in there whenever I feel that I need twice as much power as I can get out of the system today. To be honest, I have already been thinking for it for some time, but I will try to find ways around it. Adding a induction stove and some sort of oven will present a challenge trying to fit them into the energy envelope that I’m aiming for at the moment. I’ll cross that bridge as I get to it.
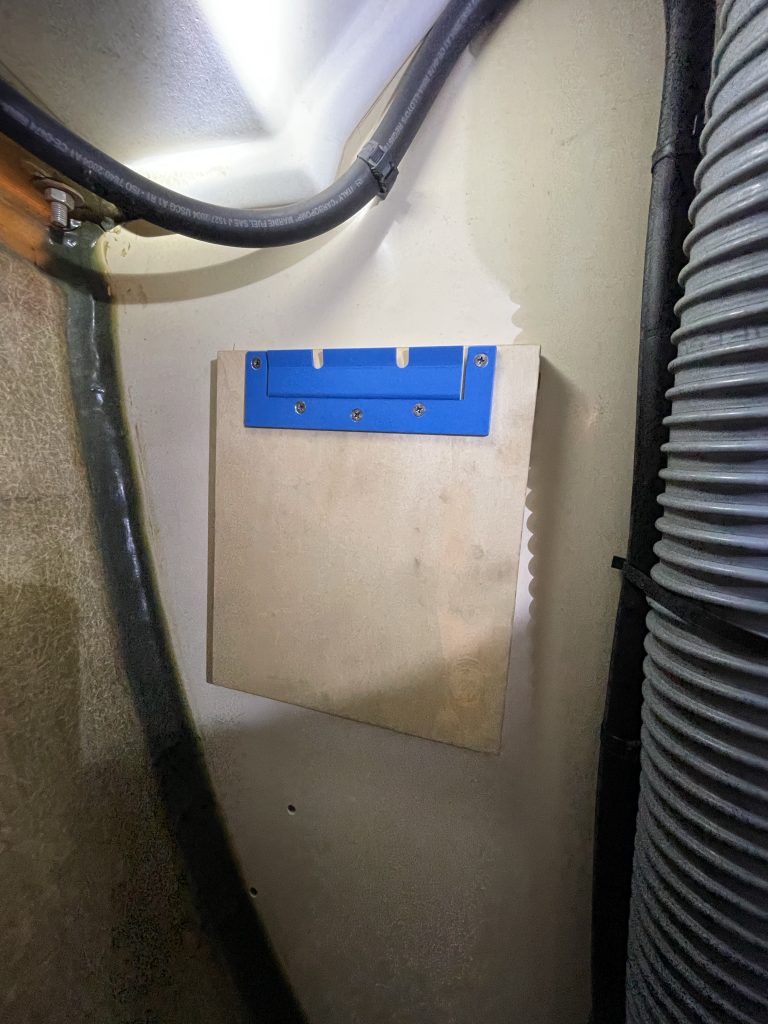
As I mentioned earlier I made a backing plate for the MultiPlus as well as to the Isolation Transformer, as shown in the image above. The reasoning is that the bulkhead is a mere twelve millimeters thick and considering that each of these blue boxes weighs in at 23 kilos I figured it would not hurt adding another 18 millimeter by epoxying these sheets to the bulk head, so that I could have a little longer screws keeping them attached to the boat. Normally, I wouldn’t have cared much to add any thickness, but on a boat it isn’t just about making sure it sticks to the wall, it’s all about making sure it stays there. As I sail I want to be absolute 100% sure it won’t come tumbling down at the worst time possible, possibly taking down the whole electrical system with it. It is, indeed, a critical system. Without power the boat will still sail, but it will be blind without its instruments and without the autopilot I will most likely be occupied steering all the time, so I would not be able to handle any other issues happening at the time. I picture the situation happening in a heavy storm with really shoppy waves and very little margins for errors. So if I can spend a little time now and build it for that situation I will have one less thing to worry about.
So, yeah, I have finally started to build the power system that I have been planning for so long and it coming along nicely! I have also ordered a REC ABMS, that will make sure that the battery cells are in tip top shape, a contactor that will be used to isolate the battery pack all together if it is needed. The normal use is when I leave the boat for an extended period of time and don’t want the battery to be dis-/charged. But it can also be used to automatically disconnect the battery if something is wrong, like running a too low voltage or trying to over-charge it.
I still have to order all the cables to connect all the parts and it will be what I’ll do this weekend. Cables, bus bars, tools. All that goodness and then hopefully I can wire it all together and hook the old electrical system to the new battery! I got a new shore power connector too! Yes, I really don’t like the one I have as it is missing its lid and the connector on the cable is cracked so it isn’t possible to really tighten it down. I think it is a bad design really, so I got some IP67 connectors to replace it with. It can also handle 32 ampere, which will be useful in the future. The cable will have to be upgraded then, though. Even if I’m determined not to stay in a marina for any extended period as it costs a lot, it’s good to know I have gear that will stay together.
It’s Friday today and as I started this post I just want to mention that we have a storm passing by here again, the wind speed top notation was 53 knots this morning, which is almost 100 km/h, so the boat is a bit restless and moves quite a bit. Thankfully she has calmed down now, so she doesn’t heave, roll and vibrate as she did earlier.
Yesterday it was totally different, and it will go back to this soon again. Not too bad for December anyway, as I see it. I see that it has started snowing in Sweden now. There will come a day when I will yearn for snow again, today is not that day though,