
Yesterday I jumped on a new project that would be very beneficial if I can get done prior getting Away into the water – making sure that the dinghy doesn’t leak. To be honest, last time I inflated it I thought it had been target practice for someone with a nervous shotgun trigger finger. It seemed to lose air in pretty much all the cells (do you call it sells by the way? I’m just making sh*t up here, haha!) so I thought it was a write-off.
But now I’m not that sure any more. It could be that I inflated it when it was warm out and the air just shrunk when it got colder. I don’t know. I have to continue investigating this.
None the less, yesterday I posted this video on Facebook, and asked if my little unorthodox way of trying to fix the leaks would work or not. I got some comments, like not using a water based glue and that it would probably take some time if the water in the glue needed to evaporate to be able to create a seal. All valid points!
So, do I think it will work? Or does it work? Can we make any conclusions yet?
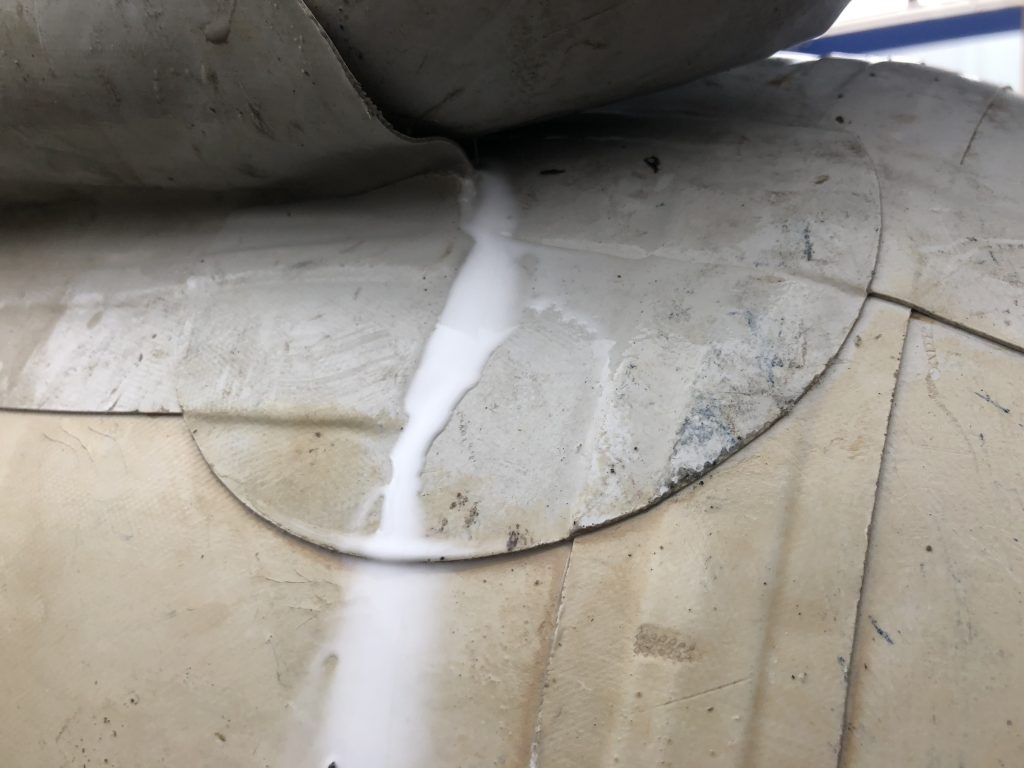
Well, as I say in the video, the worst case will be that it will show where there is a large leak by the glue pouring out of it. And, yes, it poured. A tell-tell sign that the hole was a bit larger than pin holes. But the good news is that I know where the holes are. Yes, are. There is two, but they are close to each other so it should be possible to patch them in one go. All I need now is some glue, since I already got the patches.
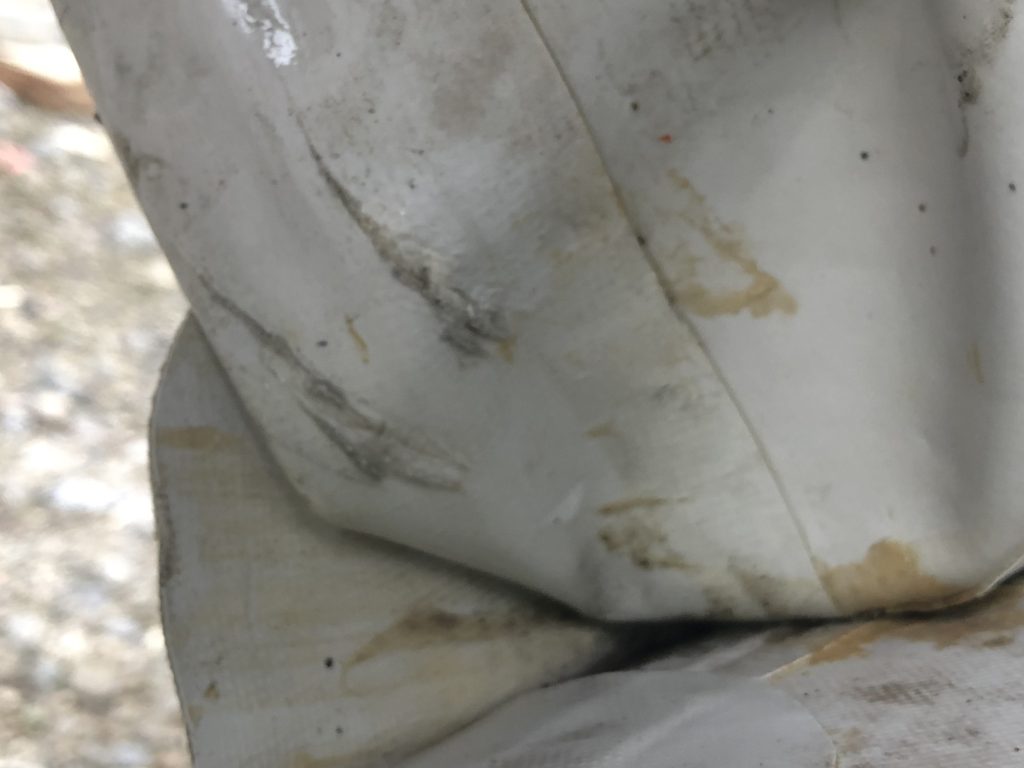
Both of these scratches was bubbling white glue bubbles when I filled it with air. So tomorrow it is time to take a trip to the chandlery, to get glue and this time I should try not to forget to buy an anode for the propeller as well. Third time a charm?
I have been kind of busy today as well, I started before breakfast and cut four new hatches in the sole of the galley! What? Am I nuts? Yes, probably, but it is besides the point.
I have used my multitool for the first time, and it was awesome! So, why did I do this? Well, it is actually kind of simple. You might remember when I removed the sofa and found the bilge full of water and rusted keel bolts? Well, the major reason that it looked as it did was that no one had unscrewed the sofa and had taken a peek. Because people are lazy. I know, I am. So. To make it a bit easier to take that peek under the sole as well as giving me better access to the bilge in general I decided this morning to have a go at it.
I’ve been struggling a bit on how to do the cuts, mainly because I couldn’t extend the line from the sofa since it would have left a sharp “point” on the rounded corner of the hatch adjacent to to the sofa. I couldn’t do the cut after the rounded corner either, since for some reason the sofa is just hanging on the edge of the floors under (you know, floors, the thing that the sole of the boat – that you walk on – rests on. It is all confusing…) and if I cut it there the hatch wouldn’t have anything to rest on. So I was thinking of cutting the sole straight up the center of the floor, but then I would end up with a thin strip of sole all the way on the side of the sofa, and they are fragile so… No. And then I realized that I should do a mix of the two! Cut it at the radius of the rounded corner, but perpendicular to the floors, and then cut down the center of the floor! Oh, yes, it was obvious as soon as I realized it and instead of eating breakfast I got to work. It only took an hour and now I can open up and access the entire bilge in front of the galley. It is really nice, and I have a plan to make it even better, but that project will most likely come later when I have evaluated the storage on board.

Talking about storage, I finally got some baskets for the fridge as well. Two smaller and two larger that stacks. Really nice! It has been quite frustrating to have to dive down to the bottom every time I needed to pick something up. Obviously this is an effect of Away being a charter boat, since there usually are some sort of shelves or baskets that can be used. But somewhere along the way all that is left is a metal thread basket that seen it’s better days. Anyway, now I can start adding things to it without worrying to have a large pile to dig through every time I need to get something from the fridge.
As you can see the compressor works really well, but I’m not so sure about the thermostat. I have tried to set it to both extremes to see what happens, but it looks just the same. It runs 24/7 and that is not good, since it drains the batteries rather quickly that way. But I have bought two 1-wire thermometers that I can connect to an arduino to control the compressor, I just need to get it hooked up and figure out a good regulator equation. I bet there is several out there on Internet.
Another project involving an arduino is closing up it’s completion too! I finally took the step to cut the hose for the water counter today. I put the flow meter before the pump, on the low pressure side. And then nothing worked! The pump never turned off, constantly pumping air into the system rather than water. Well, that sucked. It took me about two hours to disassemble everything, check each component so that it wasn’t letting air in. I thought I found the issue, assembled everything and still, no bueno.
Sigh.
Okay, disassemble again, go over all the parts, test them with partial vacuum (by sealing the other end and sucking out the air with my mouth). Everything seemed fine. Assembled it all in place, did a check again, still sucking in air. Found the culprit (a hose was a little narrower at one end, cut it a bit shorter – voilà) and now it all works.
This is a short video showing the counter in operation.